Friday, May 30, 2014

Week 9

For Project 2B, we are required to finish the rendering for interior of our building. Thus I started off by adding furnitures and finishes for the interior of my building. I downloaded the furnitures from Archive 3D. Below is a picture of the sofa.

Here are the process of me adding some furnitures into the living room.


After I added the furniture, I applied the materials on the furniture. I spent quite some times to try different kind of colours on the furniture to get the appropriate one.


Besides, I even used a drawing of mine to make it as a picture to frame it on my master bedroom. Here is the drawing of a zebra I did previously. I scanned it and put it as the picture using the Material Editor.

Moving on, I used Target Camera to get the correct angle that I want to capture. I applied the method that I have learned in lecture class to get a nice angle of it.


I tried out different angles but at the end I decided to get with this one as it best showcase the living space. After this, I will be applying interior lighting into the space so that the interior will be brighter.

Friday, May 16, 2014

Week 8 & Submission

For this week, I started off by adding a door handle to my door to make my building more detailed. I download the file from Archive3D and I imported and merged to my file. Below is a picture of how it looks like when I import the file.


This is how it looks like after I scaled and rendered it.


After I finished everything, I made all my trees under one layer and I turn it off so that it won't make my whole file lag. Later on, I clicked Environment Render to change my background. I got a photo of a sunset view as I feel that my building will be best presented during the evening time. Thus, I used the method from I learned during lecture time to change the background. Also, I changed the figure for Exposure value to 12 as the daylighting is the best compare to others.


Moving on, I set the camera view to get a nice angle of the building. I tried different kind of angles to pick the best ones. I did not choose a bird eye view as I know I will have some trouble adding the trees in scrubs using Photoshop. So below is one of the angles I chose as one of my picture.


Next, I saved my file into PNG and opened it in Adobe Photoshop so that I can make some colour changes and adding scrubs into my picture. Below is a photo of I add in the scrubs.

After adding trees and scrubs, I edit the colour of the background to make it more contrast so that my building will stand out more. Also, I added some sunlight to make my picture more realistic. In a nutshell, below are the 2 photos that I am submitting for Project 2A.
Scene 1 (Eye level view)

Scene 2 (Eye level view)


Scene 3 (Worm's eye view)


Friday, May 9, 2014

Week 7

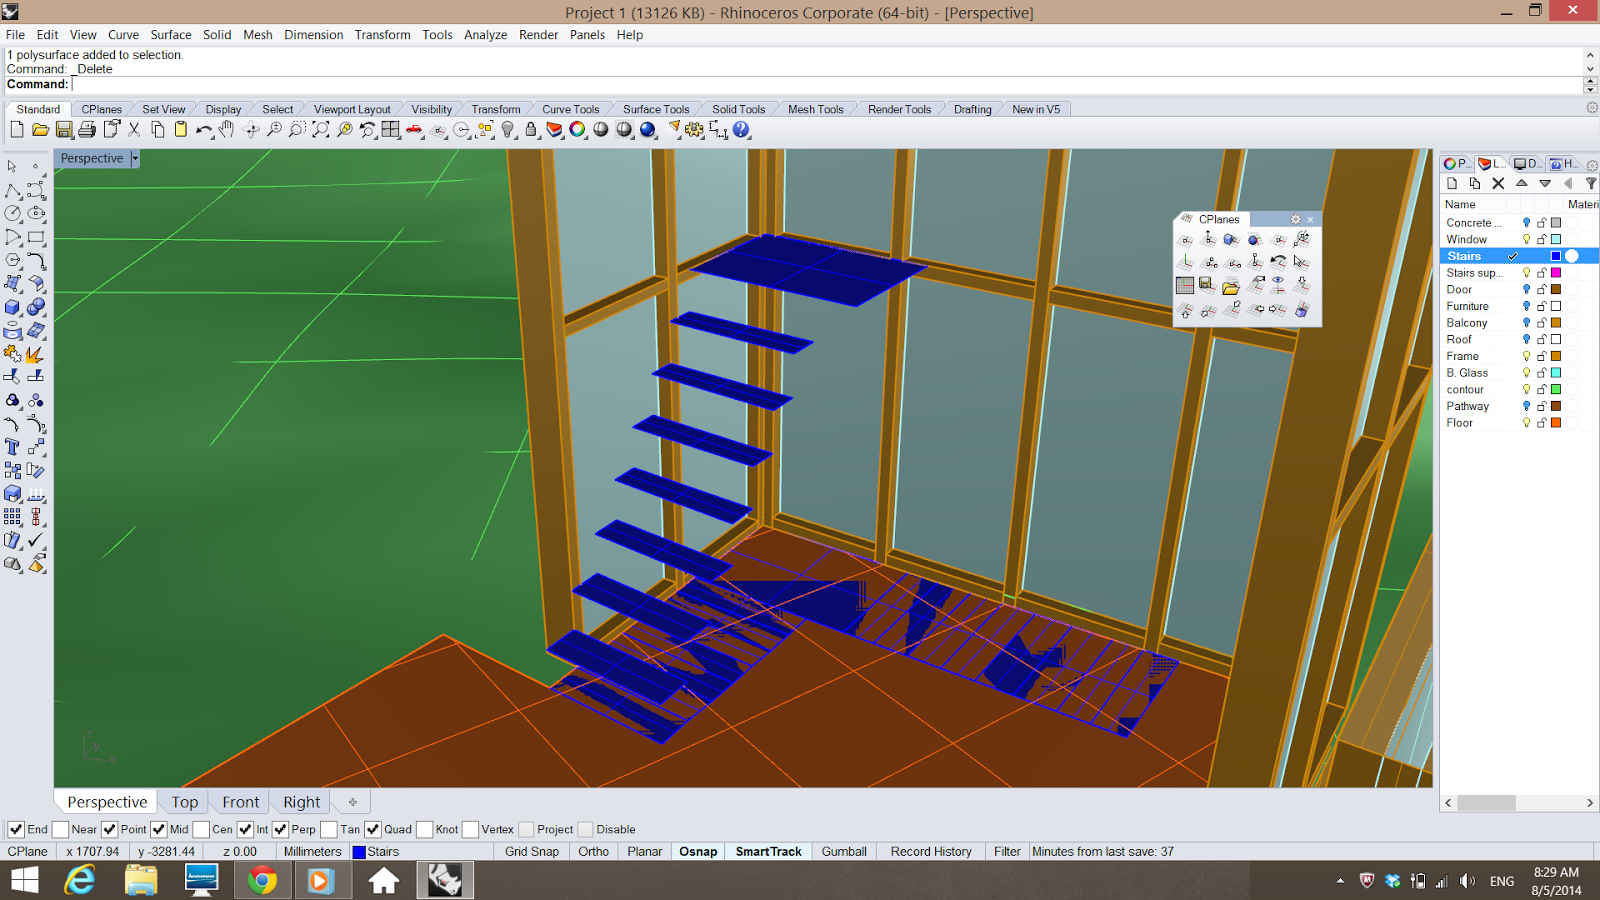
After the submission last week, I proceeded my progress by finishing off the interior of my building. I did the staircase by extruding the lines I drew before. It took me quite some time to finish everything as I need to extrude it stairs by stairs.

Here is a picture of how it looks like after deleted the extruding walls.

A picture of how it looks like at the end.

Moving on, I imported my file into 3D max so that I can start rendering the exterior and finish off the site context. First of all, I coloured my contour brown as the site is mostly covered with grass and soil.

After I was done with that, I started doing the grass by choosing "Hair and Fur" under "Modifier List" and I did some adjustment at the figure so that the size and height of the grass looks appropriate. Below is a picture of the grass before I edit the height and the colour.

Here is a picture after I made some adjustment.

A closer view.


Next, I started to insert the materials on the facade of the building. Like timber frame, concrete wall, etc.

A picture of it looks like at the end.

After I m done with the materials, I started to insert trees. I downloaded some trees from Archieve 3D as the one provided in 3D Max does not suit my site. So I merged the file downloaded into my file. Then I scaled it.

Here is a picture of how it looks like after I scaled it into a bigger size.

Later, I rendered my trees with some colours so that it looks more realistic and I am quite happy with the outcome of the tree.

Here is an overview picture of the trees and my building on site. I will be continuing to add more trees and later on I will be adding the Daylight and sky for my last part of this project.

Thursday, May 1, 2014

Week 6 & Submission

Continuing my progress since last week, I completed the roof of my building. Also, I did some touch up to my building.I did the contour by drawing lines of contour and I turned on the Gumball so that I can adjust the height of the lines to the height that I want. Later on, I selected all the lines and patch the surface.Thus, that is how I did my contour. Moving on, I changed the colour of the layer so that it looks similar to the actual material of the building. 


Another view of the picture that shows the contour of my site.

In order to render my building, I decided to import my file to 3D Max. First, I highlighted everything on rhino and I typed Export and saved it as "dfx". I did it in this way so that all the layering in Rhinoceros will be transferred to 3D Max and it will save a lot of time when I m applying materials on the building.


Then, I imported the file into 3D Max and here is a picture of how it looks like before I render using 3D Max. As you can see, the building and site is already in colour as I when I export the file in Rhino, I didn't change from Shaded to Rendered. But still, it is possible to change the colour in 3D Max.

In order to change the colour of the material, I typed "M" and "Material Editor" will appear and I start to choose the colour I want and place it on the specific part of the building. I chose to use  "Glass-Clear" for the curtain walling and sliding doors as I feel that it looks more realistic if I render it white. The process of doing this was quite fast as nothing major is required in this process.


Below is a picture after I applied some colours onto the buidling.


Then, I chose a few nice angles and rendered my building. So here are 5 pictures of different angles after I did some simple rendering. In a nutshell, the is what I am submitting for this week.